Starting your own t-shirt print business is great until you realize how many hurdles you have to overcome.
Once you’ve mastered the art of creating an eye-catching design, you realize that you’ve reached yet another hurdle: figuring out how to properly center your vinyl t-shirt design.
When is an Off-Centered T-shirt Design a Problem?
Every so often, I will come across a misprinted t-shirt with a design that is slightly off-center and it doesn’t raise a red flag to me. If it’s millimeters off, it’s not a problem. But if a design is visibly off-center, there’s no getting around it. I can’t ship this to a customer. It’s a bad print.

Making and printing vinyl t-shirts is an intricate craft with many things to consider during and after the process.
However, there is nothing more infuriating than lifting that pressed t-shirt and realizing – after all of your hard work – that your design is off, and having to start all over again.
Centering and vertical alignment is not quite as difficult when you are pressing a design with 11″ x 15″ dimensions. But centering and aligning a 2″ tall by 10″ wide design is much more challenging.
Continue reading to find out how to master it every time.
The Folding Method
Perhaps the easiest way to find the center of any t-shirt, the folding method has been proven by avid t-shirt printers to work time and time again.
It is a method that can work for finding the center at both the front and the back of the t-shirt and will save you a lot of effort in the long run.
First, you need to warm up an iron to help you create some clear creases.
Lay your t-shirt of choice out on a flat surface. You may want to do this directly onto your t-shirt press but you don’t have to.

Taking one side of the t-shirt, fold it in half to create a vertical crease (shoulder to shoulder). Make sure that the sleeves, edges, and shoulder align otherwise you will have an off-center line from the get-go.
Once you have made the perfect fold, use your hot iron to press a crease on the fold you have created.
Repeat the process, but this time create a horizontal line. Lift the bottom of the t-shirt to the very top and form a crease with your iron.
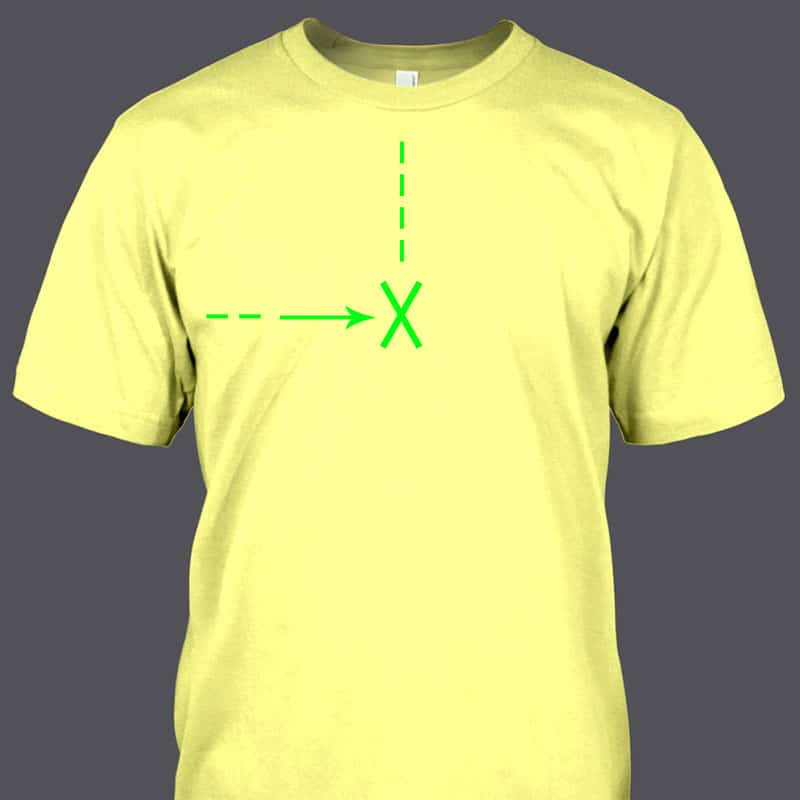
Now, when you unfold the t-shirt, you will see two distinct crossing lines. The point where they meet is the very center of the t-shirt. You can use this point to determine the best place to print your design.
To ensure that your design lines up properly, copy the same folding method this time using the actual vinyl print itself; take your print and lightly fold it in half to create a crease down the center, then again to form a crease across the middle.
Take your crease vinyl and line up the center point to the center point of your t-shirt. Using some heat or printing tape, secure your design down.
Then, you are ready to press your print!
The Measuring Method
If you are a beginner vinyl t-shirt printer and you want to be sure that you have centered your design properly, then why not whip out the measuring tape.
There are other tools out there especially made to help t-shirt printers properly find the center of t-shirts, but a measuring tape is just as good a tool for the job.
As a general guideline, the top of your design should be placed 3” down from the t-shirts collar line on an adult’s shirt and 2” down on a child’s shirt.
This rule can be applied to both picture prints and single text lines. You can also measure out a back design if you so wish.
Narrow Text Prints
On single line text prints, you will need to test the 3″ rule. Usually in this case, the print will fall slightly lower, sitting vertically centered across the chest. To test the perfect position in this type of design, simply tape the vinyl in place and try a shirt on to verify the placement. Once you have determined the optimal placement on this type of design, measure the top of the design from the collar line. While the position may vary slightly on small or oversized shirts, this will give you a good idea of the ideal placement.
T-shirt Back Prints
The back of a t-shirt is going to provide you with the most space to show off your design. So, to center your print, measure 4” down from the collar or 3” on a child’s t-shirt.
V-Neck Shirts
There may be times that you wish to use a non-crew neck t-shirt such as a low-cut or V-neck t-shirt. Either way, you still need to center your design which can be harder as there is less space to work with.
The general rule for finding the center of v-neck shirts is starting no more than 1.5″ below the v-neckline. Any more than that would be too low and would look off.
We would suggest still using the folding method to find the horizontal center of a V-neck shirt just to make your life a whole lot easier.
Using a Tool to Center Your T-shirt Designs
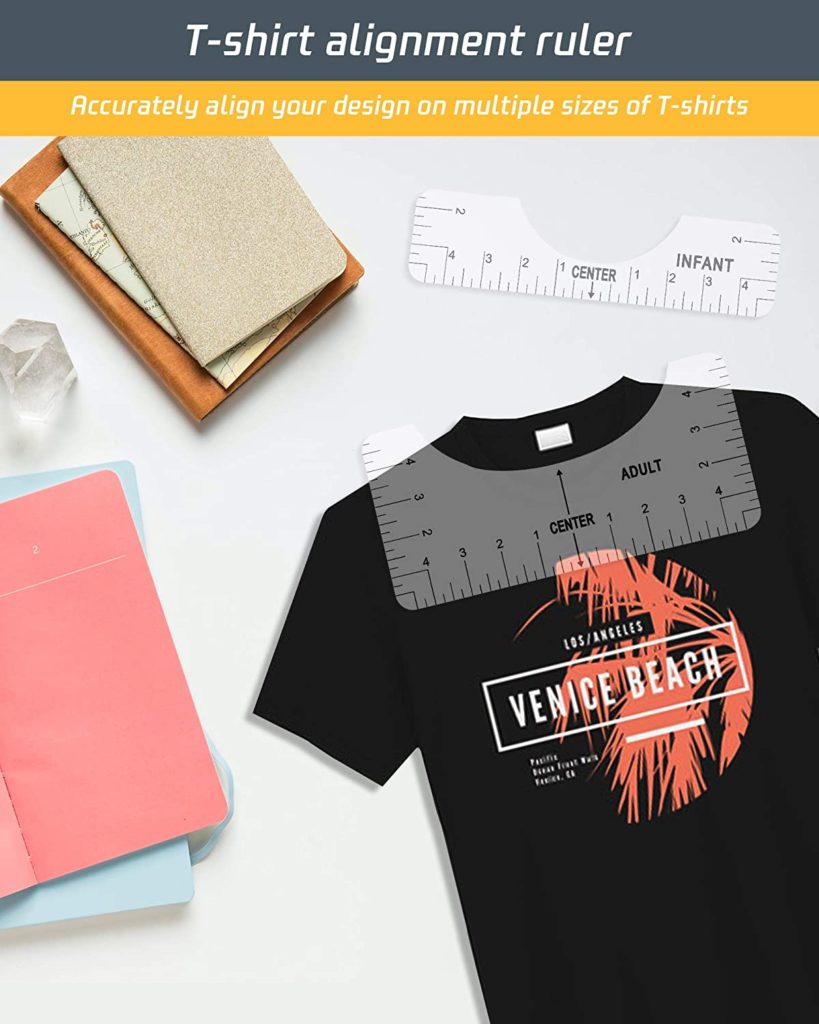
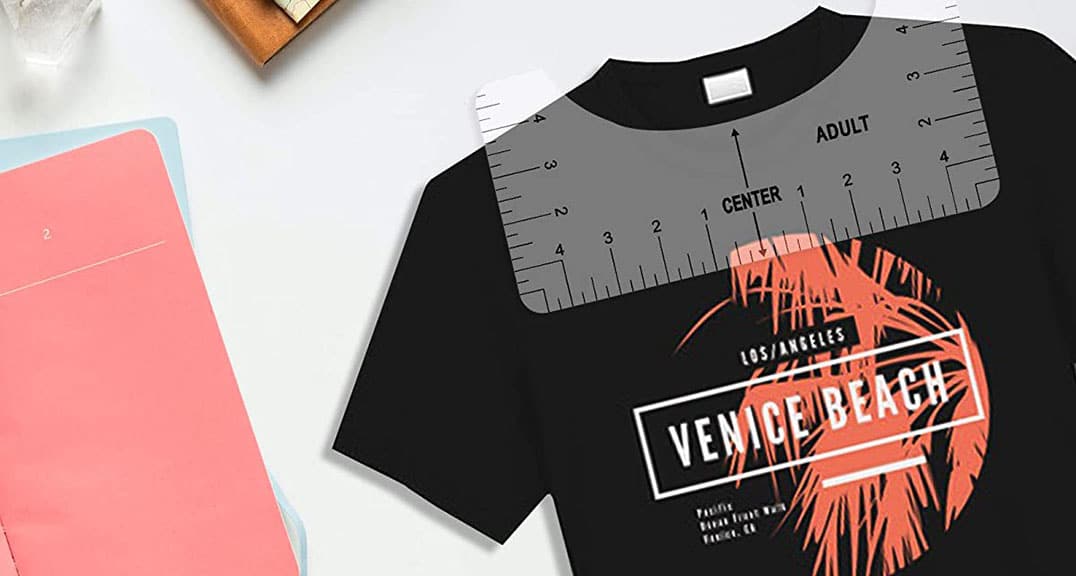
If you want to use a tool to help center your T-shirt designs, there are a few out there. There’s no need to spend a lot of money on a centering tool. There are a few things to look for if you are going to invest in a design alignment tool:
- Make sure you buy a tool that accounts for different shirt sizes.
- Buy a shirt alignment tool that is made of high quality material.
- Ensure your tool is small sized and light weight, easy to carry.
- Your t-shirt alignment tool should allow simply aligning the ruler to the collar and centering your design before pressing.
- Make sure the tool has a clearly visible printed scale, that is easy to observe and mark.
- Your t-shirt design alignment tool will help with any t-shirt design, whether it’s vinyl, sublimation, screen printing, and more.

One of the best reviewed alignment tools under $10 is here.
T-shirt Design Placement and Sizes: Final Thoughts
Even if you follow the methods we have laid out, there are still a few things to consider.
For example, depending on the shirt sizes, no matter how hard you try to center it on the t-shirt, it may not look right. For oversized shirts, it is more difficult to get the centering just right. It definitely takes a little practice.
Some guidelines suggest that your design should be between 11”- 14” for an adult t-shirt and 5.5”– 9” on a child’s t-shirt, but these are very loose guidelines.
Personally I like using 11-12″ max width for designs on Adult Large unisex t-shirts. You can use the 12″ max width if you go up on size. For example. 12″ width still looks good on XL and 2XL. As you get into oversized shirts like 3XL to 5XL, you can gradually move out to 13″ or even 14″ wide on your designs on the oversized shirts.
On shirts smaller than Adult large, I typically drop the design down in increments of an inch or two depending on the design. For example. The design that is 12″ wide on Large, I size down to 10″-11″ wide on Medium, and normally 8″-9″ wide on small.
You can usually tell if your design is too big or small for the shirt just by looking at it, but if you are still unsure about how good the design will look on certain t-shirts, try printing your design out onto a sheet of paper first. You can cut out the general shape of your print and center it on your chosen t-shirt.
Vinyl design t-shirts are easy to make and are very profitable for sell on your Etsy store or eCommerce store. I’ve sold a ton of them. If you have any questions, let me know!
Bryan E. Robinson is the owner of TshirtGrowth. He has sold t-shirts since 2006 through dropshipping, screen printing, vinyl printing, DTG, Print on Demand, and more. Bryan has created his own t-shirt designs through Photoshop, Canva, and other platforms, as well as worked with freelancers to create many of his designs. Besides t-shirts, Bryan has 18 years experience in online marketing with eCommerce, B2B SaaS, B2C products, and more.
Bryan E. Robinson is the former owner of TshirtGrowth. He has sold t-shirts since 2006 through dropshipping, screen printing, vinyl printing, DTG, Print on Demand, and more. Bryan has created his own t-shirt designs through Photoshop, Canva, and other platforms, as well as worked with freelancers to create many of his designs. Besides t-shirts, Bryan has over 18 years of experience in online marketing with eCommerce, B2B SaaS, B2C products, and more.


